
We’ve had many clients come to us looking for us to put together button for them and, in the past, went to www.buttonoptimizer.com to design buttons for them. Recently, however, we found a plugin called MaxButtons that is much easier!
With MaxButtons – you install the plugin and it automatically shows up on the lefthand side of your WordPress Dashboard.
To make a new button you click “Add New” and are brought to a page with a variety of options to choose from.
The first section that pops up is “Basics”
In the Basics section you can put the URL where you want the button to go to and input the text that appears on the button.

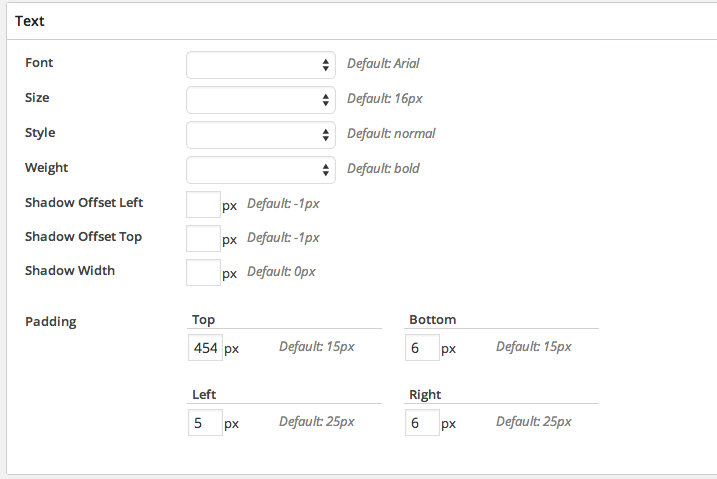
The next section to make edits in is “Text”. In the Text section you can change all aspects of words you’d like to appear on your button including the following: font, size, shadow, and padding.
Unsure of what “shadow offset” and “padding” are? MaxButtons has a preview where you can see the changes you are making, as you are making them, when you scroll through the plugin.
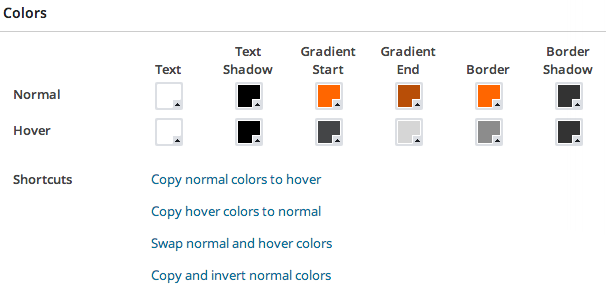
The last section to change up is the “Colors” of your button.
To change the colors you simply click on the box you are looking to edit and drag it to the color you are interested in.
Developing a gradient effect on your button is always a good idea. The gradient gives the button more of a professionally designed look that’s aesthetically pleasing.
When it comes to the gradient, whether you start from a light color to a dark color or dark to light, it’s all based on personal preference.
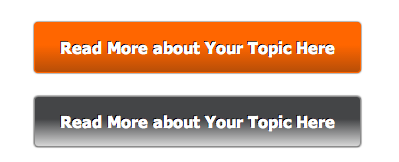
Here’s what the button looks like with those settings:
After you’ve developed the button you’d like for your website, all you have to do is copy the shortcode assigned to it, and paste it where you want it to go on your web page.
It’s that easy!
Hope this blog helps you when putting together the Call-to-Action parts of your website. For more questions visit the WordPress MaxButton plugin forum here.